In Our Last Blog Posts Home Lab Part 1 and Part 2 we have already seen the installation of our first machine of Home Lab Environment. It's time to proceed further with other Virtual Machines.
Create another Virtual Machine to run ESXi
Beware that running ESXi on a Virtual machine (Nested) is dedicatedly for solving the purpose of home lab and not suitable for production environments.
While creating virtual machine for ESXi i allocated (4 sockets*4Cores with HT enabled) in total i got 16 logical CPU, Memory 6 GB, you can lower down the number of CPU based on the underlying resources you have. (Maybe you can go with 2 logical CPU) but this logical cpu will have a direct relation with the amount of vCPU that you can assign to a virtual machine.
With above example i used in my environment i can go till 16vCPU for a single VM and later part you can go with 2vCPU to a single VM.
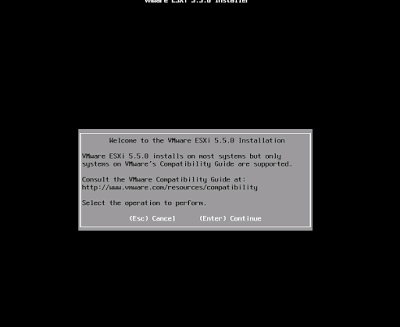
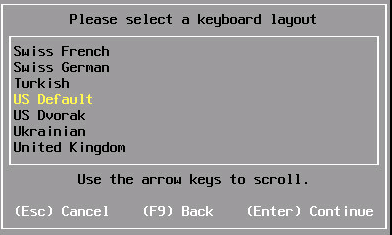
When it comes to installing ESXi host there are few steps that we need to follow below are the screenshots for the same.


Once ESXi is installed and we have provided the DNS and IP details it's time when we have to go back to our domain controller and make an entry of this ESXi in forward look up zone to ensure the FQDN is resolvable and both DC and ESXi can communicate.

After successful addition of new host in domain controller we need to verify if testing the management network from DCUI pass.

Create another Virtual Machine to run ESXi
Beware that running ESXi on a Virtual machine (Nested) is dedicatedly for solving the purpose of home lab and not suitable for production environments.
While creating virtual machine for ESXi i allocated (4 sockets*4Cores with HT enabled) in total i got 16 logical CPU, Memory 6 GB, you can lower down the number of CPU based on the underlying resources you have. (Maybe you can go with 2 logical CPU) but this logical cpu will have a direct relation with the amount of vCPU that you can assign to a virtual machine.
With above example i used in my environment i can go till 16vCPU for a single VM and later part you can go with 2vCPU to a single VM.
When it comes to installing ESXi host there are few steps that we need to follow below are the screenshots for the same.


Once the ESXi is installed will be Configuring ESXi through DCUI (Direct console user interface).


Once ESXi is installed and we have provided the DNS and IP details it's time when we have to go back to our domain controller and make an entry of this ESXi in forward look up zone to ensure the FQDN is resolvable and both DC and ESXi can communicate.

After successful addition of new host in domain controller we need to verify if testing the management network from DCUI pass.

Likewise we have installed one ESXi and configured it you can go ahead and create as many as VM's you need to host your ESXi. ( I used Name as ESXi4 because i created 4 ESXi's)
No comments:
Post a Comment